Saturday, September 1, 2012

Adding lightness intelligently

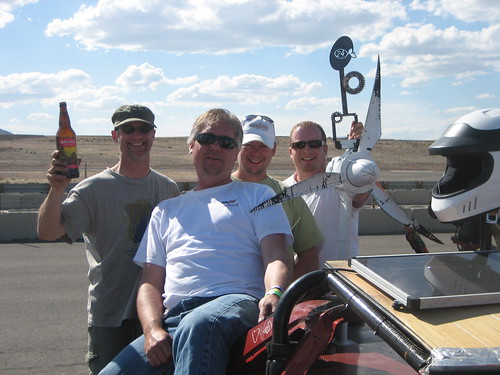
"Gotta make it light. Gotta make it light. Gotta make it light." has been my mantra through three grueling days of sweaty, grit-filled, ear-splitting metal removal. I've moved methodically from nose to tail of the stripped-down car removing EVERY. LITTLE. PIECE. ...that isn't absolutely necessary to a race car effort.

This is a truly crap representation of the hundreds of little tabs, brackets, mounting points and reinforcement plates (for things that no longer existed, of course) that were removed. In the end, JUST with the palm-sized and smaller stuff, I filled two and a half 5-gallon buckets weighing a total of 33.5 lb. Yes, three days for 33.5 lb. This may seem insignificant and a waste of time, and it TOTALLY WAS. Though, in a few paragraphs, we'll see that maybe it wasn't. Either way, I"ll never, ever, ever do it again.

Taking all that stuff off took effort. I tried many ways to do it. I found a 100% best way. Let me share. In olden days I grabbed a grinder and wailed away on the spot weld until all metal within 2" was badly mangled and what was left of the bracket fell off.

I have also used a cutoff wheel on an air grinder, which remedied the 'destroy everything' of the grinder and simply cut a huge gash in whatever I was working on. I also universally failed to remove spot welds
For the start of this adventure I bought a spot-weld cutter, direct from the highest quality tool merchant available.
This worked admirably the first time. Then the tip thing snapped off a bit. So I started pre-drilling the center so the centering pin had somewhere to go. This was a lot of effort, as I had to completely drill through whatever I wanted to cut. Using this technique, the spot weld cutter lasted about an hour, or 4% of the car. Eventually, I had broken all the teeth off both sides of the saw portion and replaced the center pin with about four different nails. Conclusion: if you only need to remove a few spot welds, this will work, but you can't take 33 lb of .05 oz brackets off a car with it.

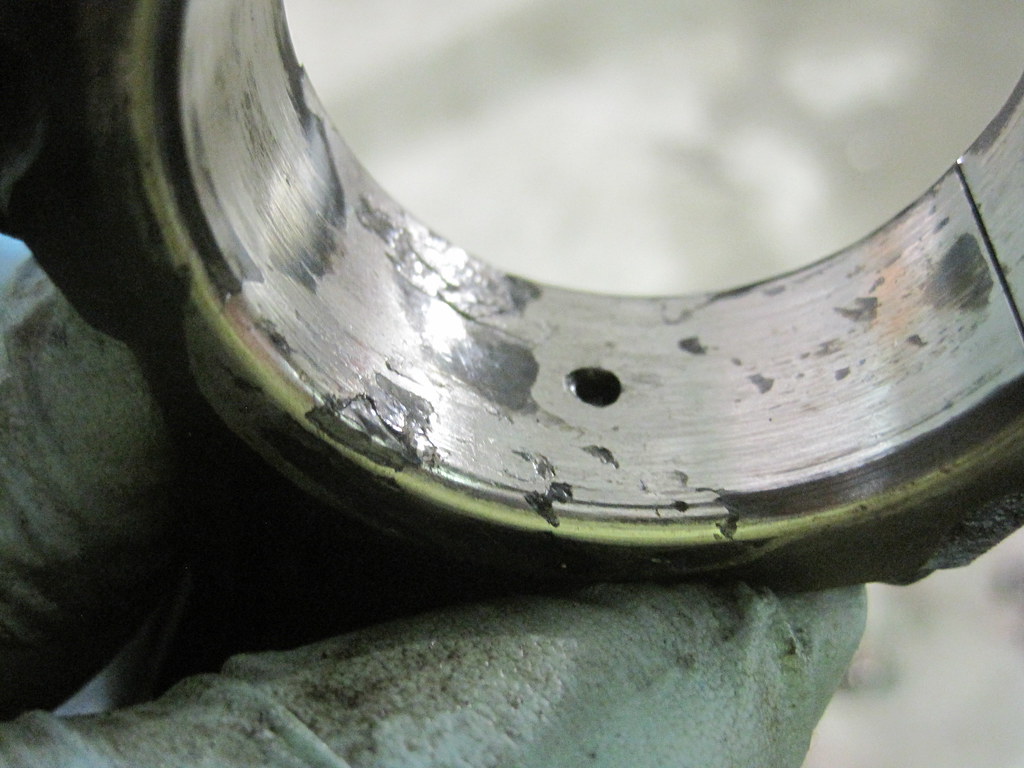
In desperation, I grabbed my box of random drill bits.
Mulling through it, I found these odd drill bits I've had forever.
Whatever they are, they work. No center drilling, fast, last for ever. I only used two for the whole rest of the car, and the first simply broke the little tip drill and I kept using it later on by pre-drilling the center just a little bit. USE THIS! Here is the finished result once the spot weld is removed:
I also admit to grabbing some of the brackets with a pair of pliers and just bending it back and forth until the metal fatigued and the bracket ripped out. Sometimes I did it just to make myself feel better.

Anyway, back to our story. While I was adding all of this massive lightness I was also keeping an eye out for improvements to the car. There are many ways an MR2 can be improved as a track car, because there are many compromises made so a mid-engine car can be a street car.

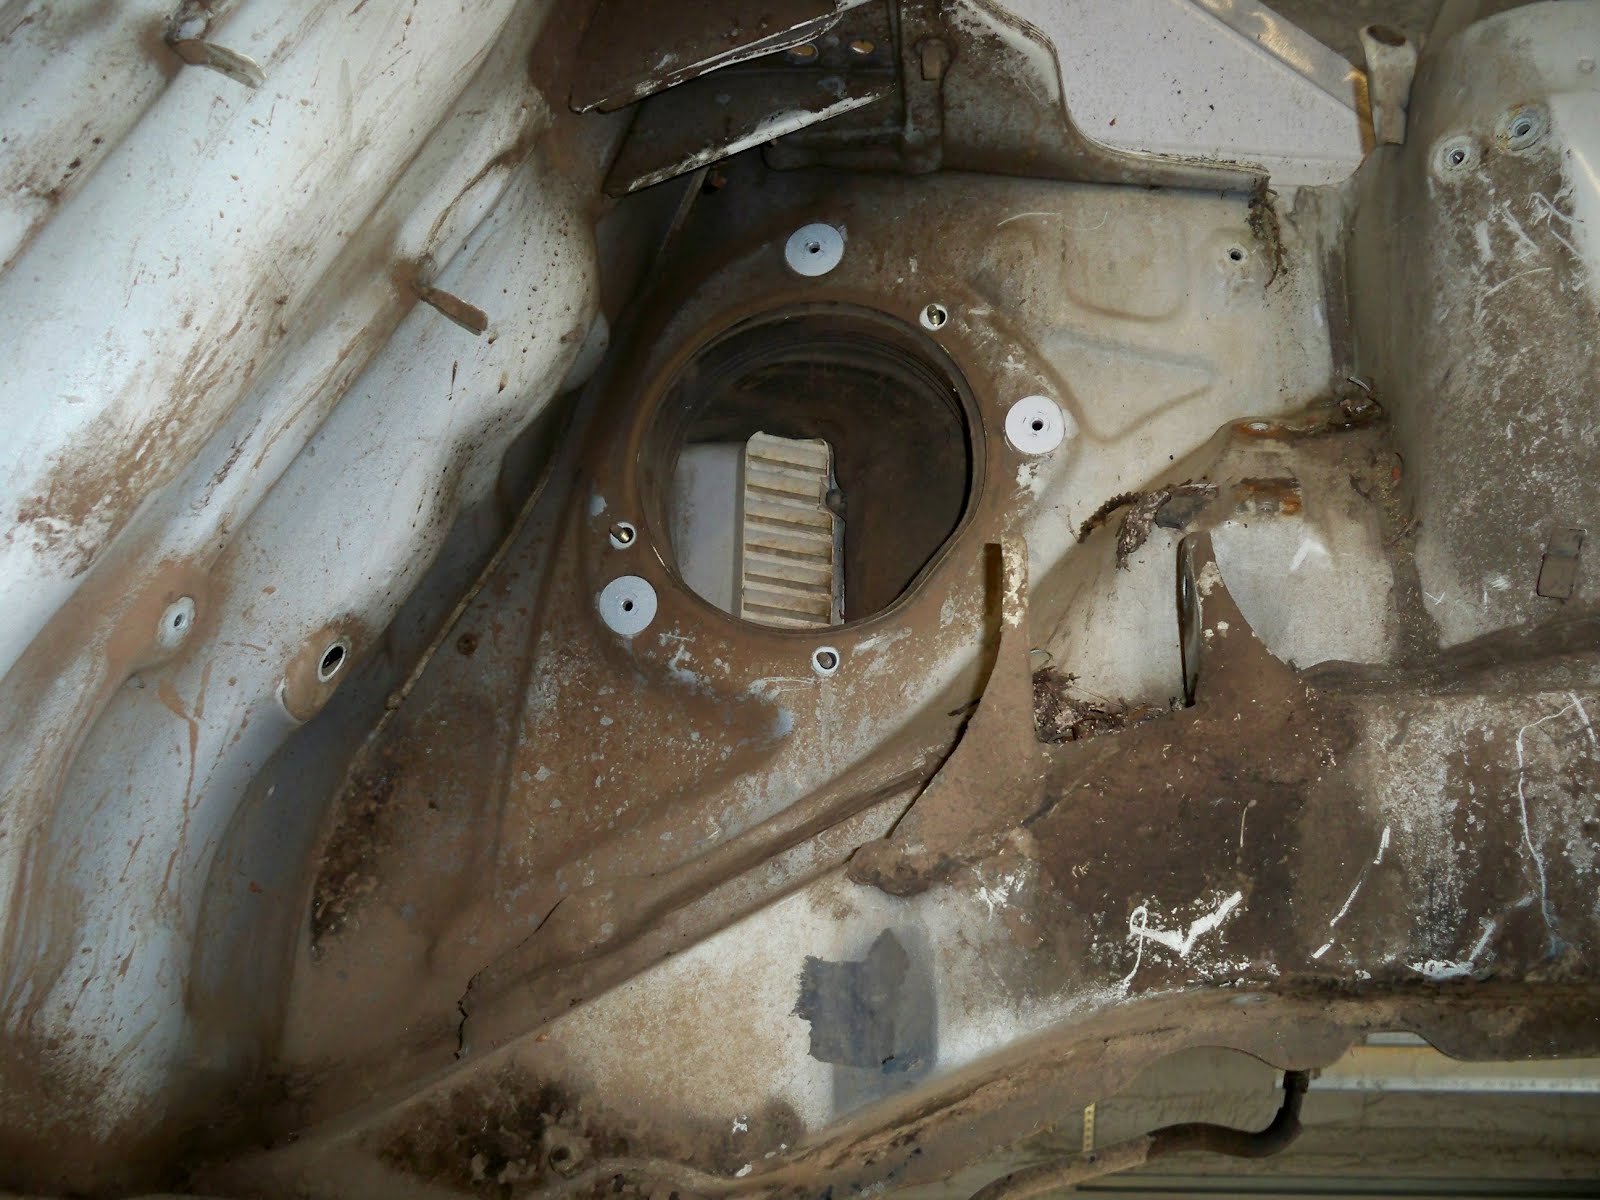
One of the great things about an MR2 is the absolute lack of storage space anywhere. In an attempt to remedy this, Toyota created the 'frunk', or front trunk, where the engine in a normal car would be. It's exactly large enough to store nothing. The effect of the frunk, however, is that all that cool air passing through the radiator slams directly in a wall. This wall, to be exact:
See the radiator, and the fans? Blowing all that hot air ABSOLUTELY NOWHERE! So, I removed it. It is 100% non-structural, and I won't be hauling any suitcases.
Great, so now we've got all that hot air away from the radiator and into the frunk. Of course, the frunk was sealed to keep said suitcases warm and dry. Our primay means of venting the hot air will be to louver the hood and bend the louvered pieces down into the frunk (coming soon). In addition, I removed large portions of the upper-firewall allowing the air to escape out the back of the hood at the base of the windshield.
The only purpose of this metal was to hide the windshield wiper arms and allow the heater/vent somewhere to pull air from. We'll block off the vent hole into the cabin, and now have lots of room for the hot air to escape at the low pressure zones.

For those of you paying attention, this has the added benenfit of having all the cooling air exiting over the car, as opposed to under it like most front-engined cars. We have effectively increased our down-force and made the entire front of the car act like a wing. I think.

Moving rearward, we have a similar problem in the cockpit. All the oil smoke and gas fumes and oil smoke and tire smoke and brake smoke and oil smoke that wafts past our car collects in the cabin. Being a two-seater, there is really nowhere rearward for the smoke to go and it just billows around, making the driver nauseous and nostalgic for catalytic converters. My solution was to block the rear windows with a sheet of aluminum (not yet done) and vent the very rear-most part of the cabin rearward. The end result is some very cool vent wings at the c-pillar. Note the 'not yet done' part and visualize with me...
The last little problem the MR2 faces is the engine location, you know - behind the seats and in front of the trunk. In a little pocket, all mid-like. Where it gets very, very hot. Toyota tried to battle this with a side scoop and fan, vented engine lid, and complicated cooling routing. In the end, many MR2 teams battle chronic overheating in racing situations. What with our bigger motor leaving less space, this was going to be an even bigger problem. The solution? Get more air to the engine.

This starts with the wide-body concept. We will be pushing the rear fenders outboard approximately 3", leaving us a nice HUGE scoop facing forward. This scoop will collect air and direct it into the engine via these nice new holes in the side of the engine bay:
What was there (yes, pics from the first car)
One side held the stock vent/fan, the other was the fuel fill pass-though. I removed both sides to the corresponding spot welds, and will create curved sheetmetal ducting to send all that nice cool air directly onto the motor.

Once that air has hit the motor, it has to have somewhere to go! Just like in the front, removal of the sheetmetal wall between the engine bay and the trunk is called for. not only won't we be hauling any golf clubs in the trunk, but we really need to remove this to make the giant V6 fit anyway.
Now that we've gotten that hot air into the trunk, it has to have somewhere to go. OUT OUT!!!!
All in all, a well thought out plan to cooling, and structurally non-impacting too. I know there will be naysayers about that, so I will be adding cross-bracing where the old firewalls used to be. To facilitate all this and in preparation for the wide-body work, we removed the rear fenders too:
All the sunroof structure also came out in preparation for skinning over the hole
So, that was adding lightness. All removed items counted (give or take) I removed 53lb from the tub. Compared to the stock curb weight of approximately 2600lb this seems pathetic and a horrible use of three full days work. BUT...

Get this.

I weighed the tub, in this condition. Windshield, back glass and all.. 366 lb!!!!! In the end I removed 12.6% of the weight from the tub. THAT, ladies and gentlemen, is HUGE. Plus, our weight goal is 1500 lb, so it's 3.5% of that weight, not bad. If we can keep that up with every piece of the car, it will be amazing!

If I can keep any of this up it will be amazing.

Tuesday, August 21, 2012

Doing what boys do best

With our incredible two-for-one MR2's purchase (not incredible), we had two candidates for the build. The 85 was rougher, but I didn't think that would matter since we were cutting most of the body off anyway. The 87 was better built from the factory, but heavier. In the end, the decision was made by laziness - the 87 has a title, therefore can be scrapped out at will for cash. The 85 did not. The 85 would be the new race car!

Being as this was going to be a 'real' race car build, two things had been clear from the start: everything was going to be light as possible, and everything was going to be torn down to its most bare state, inspected, fixed, lightened, race-prepped, and generally made amazing. It was time to do what boys do best: tear something totally apart with no real plan on how it's going to go back together.

This car looked like it had been left in a murky pond for about a decade

After about 12 hours of work, I had every bolt, every bracket, every piece that could be taken off, taken off.

Once the car was torn down, one thing was clear: it was trashed. The back corner had been hit very, very hard and then poorly repaired, and the damage extended far beyond what we would be removing for the wide-body. The mud was packed into the frame rails and every nook and cranny of the car - it really HAD been left in standing water for a long time. On top of it, the suspension mounting points turned out to be unique to '85, so swapping in better parts would be complicated.

I did what every dedicated auto lover would do. I cut off the one useful quarter panel, and went portland.craigslist.org: free scrap car. Attempt #1 gone in about 12 minutes.

I was able to salvage about 200lb of scrap off the car, the doors and fenders, and sell some interior pieces for $100. All in all, not worth it.

Lather, rinse, repeat. On to car #2 *sigh. Another 12 hours of work and the 87 was stripped down to nothing and ready to begin the build. Other than light crash damage on the passenger front horn, no surprises this time.

Friday, August 10, 2012

Pick Three


We were the guys dating the too-beautiful but entirely bitchy woman. The ride was amazing, but in the end we always were let down. In four years of racing Free Range has never been on the podium. We've never been top ten. We really liked going racing, being around the amazing people, and driving as fast as we could, but we were losers.
Oh yeah, there was that one thing we very rightfully won!


Free Range 1 was reliable and fast-ish when we were not. Once we were reliable and fast-ish the car was hopeless. The car was doomed, as we built it when we knew nothing about racing. We made many mistakes and very poor choices.

Free Range 2 is yet another first-gen MR2, but this car will be entirely different. Four years of learning MR2's, being intimately involved in racing, and day-dreaming about what-if's have given me inspiration for an amazing car.

All I intend to do is break one of the elemental rules of automobiles.

What is the most famous saying about cars?

Well, OK. What' the SECOND most famous saying about cars:

- Fast
- Cheap
- Reliable

Pick Two.


I intend to pick three. That is my big secret. That is what will set this build apart from others!

I know, I know, this is not a new thing I'm attempting. It's not a secret. I won't be the first - Eyesore Racing made a legacy from it, as have countless others. HOWEVER, we have not, and now we will. Maybe.

I have three simple, well thought out steps for accomplishing this. Three things we flat-out didn't do the first time. It's simple. Easy. Really:

1. Add Lightness.
It's basic, it's free. Everyone tries to do it to some extent. I'm taking it to the next level, evaluating each and every part to see if it can be lightened, re-made better, or eliminated all together. My goal: 1500 lb car, dry.

2. Create Fast Reliability. Nothing sketchy, nothing on the edge. We will be making upwards of 220hp using a bone-stock motor, stock ecu, stock everything. We'll have bigger bearings and 5-lug hubs, using stock pieces. How? Using the Most-Boring-Car-Ever's stupidly over-powered drivetrain. Yes, Mediocrity to the rescue.
3. Build Carefully.
95% of teams buy a running pile-of-car, slap a cage in it, and go racing. This is the advice we've all been given. Not coincidentally, 95% of cars experience tragic and repeated failures that stop them from doing well or enjoying their weekend. This car will be taken down, bolt by bolt, to the bare chassis, every component checked for quality, then re-assembled correctly. Again, free. All it takes it time.

So about that last bit. Time. That's where we stand now, needing time. We have two cars to pick from, a pile of used-up parts from the race car, and a heap of spares we've gathered. That's four + cars worth of pieces to turn into one car. It's time to strip out the going-to-be race car and get working!

Monday, July 30, 2012

It was time to build a race car. To do that, we needed...well, a car. Buying a used car is hard, because there are so many available and you have NO IDEA what you're buying. I use a few simple red-neck rules when shopping for cars:

1. Whatever the average cheap price is, there is some poor sucker nearby that will sell it for half that because he needs to pay his rent or his wife needs to pay her Walmart shopping bill. Never settle for buying a regular car at a regular price. I won't pay more than $350 for an MR2 any more.

2. Do some research. Almost every race team I know has bought a car and tried to make it work, instead of figuring out what will work then trying to buy it. For the MR2, we got lucky the first time around in most aspects but were basically clueless. For any MR2 guys looking for hints:

- 85-87.5 have lighter engine internals and in the case of the hard-top lighter chassis...
- 87.5-89 have stronger engine internals, better brakes, better suspension design (different from early cars - won't swap), and more valuable tail lights, interior and accessories (more to sell). The later car is almost always the better bet to buy and there is no price difference in the market as most people don't know these differences exist

3. Show up with a trailer and cash. Seriously. The prospect of getting the heap of car out of their lawn and seeing greens in their hand will go a long way toward convincing a seller they really do want to make this deal.

With this in mind we scoured craigslist for ages (ok, days). Andrew came upon not one but TWO MR2's for $400. 120 miles away in Eugene. With no pictures. What could go wrong?!?

The seller was an autocrosser, and had a very nice MR2 in his garage. These cars were a combination of his pipe-dream ill-advised $0 race car project and a source of parts to keep his hooptie nice MR2 going. The end result was parts missing off both cars in large quantity, and what was there was hacked horribly. And the cars were on logs. In mud.
There was no suspension on the white car. The blue car had 14" honda wheels that were binding on the brake calipers. But, it was a light and fairly clean 85 (white) and a full-of-goodies 87 (blue/silver) for $400, and the white one even had an engine and transmission. Both had interiors of some kind. Clearly there was more than $400 worth of stuff here, so on the trailer they went.
Ok, they didn't actually FIT on the trailer...but TWO cars for $400!!!!
The drive home was slow and cautious, and we only lost three major pieces off the trailer somewhere between Eugene and Salem. All in all, an adventure worthy of a $500 race car

Sunday, July 29, 2012

Those of you 'in the know' will recognize that our actual progress in real life is far ahead of where the blog is reporting. It has taken many months to get the new race car project under way, and I did not want to string posts out weeks or months apart, so I have delayed writing the blog until I had lots to say. Now I face the problem that I have too much to say, and not enough time or audience-attention-span to say it all.

My aim with the Free Range Racing blog is not just to document and share our chronological progress as we strive for greatness, as so many race-team blogs do. I believe this is a journey with many lessons learned, shortcuts discovered, and important ideas developed - and I intend to share them as best my story-telling ability allows. I want you, the reader, to be a better horrible car builder for having perused my blog. As such, I will be focusing on tech articles, how-to's, lessons learned and the like in addition to filling you in on our team's progress, instead of just prattling on like a twit about how awesome our build has gone. As you all know, I will be doing some of that, too.

I hope you both enjoy what I have to say, and learn something from it!

Here is what I have planned in the near future:

- The car buying experience
- Evaluating what you've got, what you don't
- Build decisions
- The first cut is the deepest
- Adding lightness

If you guys want to see or hear something else, please comment up!

Wednesday, July 25, 2012

A New Beginning

This is Erik Torgeson. I'm going to take over the Free Range Blog and begin posting regularly about my work on the Free Range Race car and team. I hope you'll follow along, enjoy what we have to say, and maybe learn something about MR2's, our team and team mates, and the sport of auto racing.
Every good story begins at an ending, and this is no different. Though what I have to say is sad, it is also a story of hope, resurrection, and a new level of hoon.

The Red and Black Free Range MR2 has been my friend, companion, and mechanical obsession for four years. I have spent time I did not have to spend doing silly and pointless things to that beat-to-death pile of metal. We have gone through seven motors of various power and reliability, countless tires, and (I think) about 20 races. We have had amazing themes including windmills, bubbles and crystals, a flying owl, and a real turbo with no engine management. Many people have taken their very first laps on a race track behind the wheel of the MR2, and the learning curves each experienced showed in the sheet metal. But like every abused, beaten and lovingly neglected car, it got progressively slower, handled worse, and had ever-compounding issues.
The last three races were complete failures. A new team member - Andrew Pierson - and I had foolishly and brilliantly taken on turbo charging the best base 4AGE we'd had since the original motor, because more is more. We worked very hard to build a manifold, figure out plumbing, get bigger injectors, the works. We planned to run it without any engine managment, just tune for stable A/F at WOT and let the rest work itself out.
It was brilliant, and it worked. The car was FAST. Except a few things....the turbo kept falling off the exhaust manifold. And when that happened, bad things happened. At the last race, and ORP Rat Race, the clutch slave cylinder cooked, leaving us with no clutch pedal. Then the gas started boiling in the tank. Then the clutch exploded.

I was done.

So was the car. It was time. It was bent, beat, nothing worked, and it wasn't worth saving. The cage was garbage. The motor was tweaked. It could never win, let alone be much fun. I brought out the sawzall and cut it to pieces, one of the hardest things I've ever done.
I kept the door, I simply couldn't part with all that history completely. I saved Matt the C-pillar with all the tracks we'd raced stenciled on it.
I love the MR2 platform, but the 4AGE simply isn't enough motor to have fun on reliably. With my new race trouble-maker Andrew encouraging me, and Matt laughing from afar, I have begun a new MR2 build. But that is not what this post is about. This post is about saying goodbye to a long-time friend and companion of so many racers.

Goodbye old friend, you are already missed...

Monday, October 11, 2010

Portland Race Prep

It's been a while... trying to get back on the horse on this blog thing.


So Erik and I spent this past weekend working on the MR2, trying to get it ready for the Portland race at the end of the month.  In Spokane, we were battling an electrical gremlin that we were blaming the ECU for.  Come to find out, the large ground wire that attached to the frame was NOT the ground wire for the ECU... we accidentally disconnected the ground for the ECU when we were trouble-shooting our kill-switch issues.  Comedy of errors.

Well the car ran ok, but the fuel cut-out all the time... so it went around the track.. but not very well.  We raced it anyways, welcome to ChumpCar.

A couple months have past since that race and we really never spent any time diagnosing the issue until this weekend.  This is when we found the ground strap issue.  I was worried about the motor after running it for 14+ hours with fuel management issues.  The #3 rod bearing is notorious for going out first on the 4AGE motors, so I pulled the pan off.. and found this!

Not good.

Luckily, we were able to track down a new set of rod bearings at the local autozone ($32) and install them with the motor still in the car.  This little "gem" got us thinking about a spare motor for Portland.  In every race we've gone to (11 so far), we've had a spare motor (except Streets of Willows, but that's another story).  We put a new motor in the car for Spokane and apparently ruined it.  (NOTE:  People.. when I say NEW motor.. I mean we spent $80 on an ebay gasket set and honed the thing with a Makita..) So I picked up a parts car a few weeks ago as a donor.

Parts car looks better than the race car

After a quick inventory of motors / parts.. we determined we might have enough stuff laying around to salvage a spare motor.  Sure enough.. with the 5 motors we had laying around, we were able to scrounge enough parts to make something that resembles a rebuilt motor.  We're still going to get new rod and main bearings... and maybe rings.. but the rest of the stuff should be good to go.

4AGE yummies...  5 motors, 4 transmissions, 3 heads

This is our rod from Buttonwillow 08.  We never got around to diagnosing the failure, we just shoved the blown motor in the back of the shop.  Since we were in scrounge mode, we disassembled all our motors and found that bad boy.  Coming soon to a ChumpCar trophy near you!

Sorry Erik, had to.  Erik stripped the tensioner bolt with a 12-pt socket... so our came the vise-grips.  What could possibly go wrong?  This was somewhere in the neighborhood of beer #7 or #8.  by #11, we were playing darts.  By #13 and #14, we were throwing them at each other.  Erik should post pictures of his thumb.   :unsure: